Payment gateway
Introduction
inTandem allows integrating your preferred 3rd party payment gateway in an easy and convenient way.
In order to integrate a payment gateway with inTandem, you’ll need to build a middleware app that interacts with inTandem on one hand, and on the other hand, with the 3rd party payment gateway.
Payment gateway integration is built upon the following building blocks:
- Connect/Disconnect - the process of connecting (or disconnecting) to the payment gateway. This is mandatory
- Checkout - online payment. Can be used independently
- Charge - the ability to charge via the backoffice. Can be used independently
- Card on File - storing users' credit card information for future transactions. Optional
- Refund - Refunding payments. Optional
Creating the middleware app
Step 1: Register your app on inTandem
First, you need to create a payment-type app (see more details here). After your app is ready, register it in inTandem and create its token with Create Token API.
Step 2: Routes
Your app needs to have specific routes that inTandem can interact with on each one of the events during the integration and payment processes:
- GET /connect
- GET /disconnect
- GET /charge
- POST /charge
- POST /customer
- POST /customer/:token/attach
- POST /customer/:token/detach
- POST /refund
Step 3: Building the app components
Connect/Disconnect
The Connect process is the initial configuration of the payment gateway with a given account. This is a one-time operation that sets up the account with the payment gateway.
Connecting (or disconnecting) to the payment gateway is done under the payment setting page: Settings > Services > Payments.
Upon a Connect/Disconnect click event, we will open a dialog window and redirect to:
Redirect /connect?b_uid=BUSINESS_UID&redirect_url=REDIRECT_URL
Once the Connect/Disconnect process ends on your end, you’ll need to:
- Send a redirect request to the redirect_url we sent you at first. To that redirect URL, you need to append an additional query param. This param should update the Connect button on the payments settings page with the updated connect state:
- {redirect_url}?connect=true
- {redirect_url}?disconnect=true
- Sending the following POST request, lets inTandem know the connection status, default payment app, and additional parameters, if relevant.
POST https://api.vcita.biz/platform/v1/payment/settings
Payload:
{
  "payment_settings": {
      "external_{APP_NAME}_connected": true,
      "payments_gateway_type": "{APP_NAME}",
      "external_{APP_NAME}_params":  {
          "merchant_id": "{MERCHANT_ID}"
      }
   }
}
- “external_{APP_NAME}_connected”: true/false - connection status of your payment gateway (connected=true/disconnected=false)
- "payments_gateway_type": "APP-NAME" - sets the payment gateway as the default payment app
- "merchant_id": "MERCHANT_ID" - the merchant ID received from the payment gateway. This ID will be populated on your OP.
Updating the UI
While the POST request updates the Connect status on the backend and the redirect URL updates the UI, the user will still need to click the Save button on the payment settings page in order to also update the application state accordingly.
Checkout
Checkout is an online payment.
An online payment session can start in various ways, like sending your clients a payment link that takes them to the payment checkout page or by inviting them to the clients portal from where they can pay for invoices, etc.
A checkout session starts with the client landing on our product checkout page, where he can place or view the payment value.
- The user lands on the online payment page and fills in the payment information (amount, notes, etc.). It’s important to note that at that point, the user is still interacting with our product.
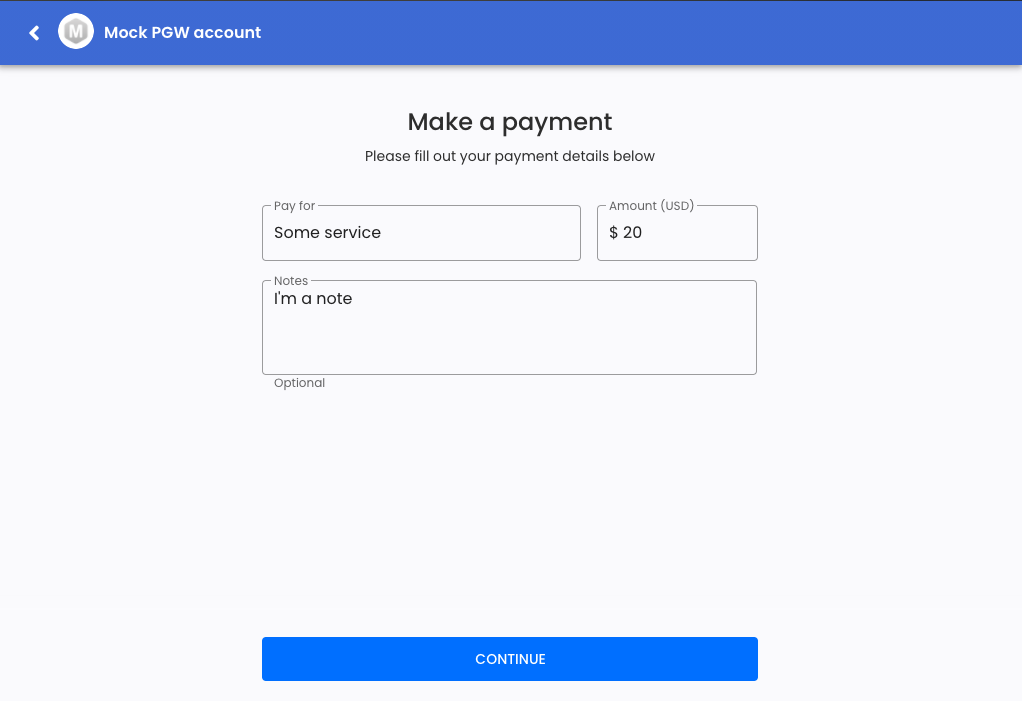
- By clicking the Continue button, we redirect the user to your app’s redirect_uri along with two URL parameters: b_uid (pivot UID) and url_key.
GET {application_redirect_uri}/checkout/:business_uid/:url_key
- Next, your app sends inTandem an API request using that URL key. As a response inTandem returns the transaction details.
You can use the business_uid value in case you have the business API token stored or generate it via OAuth instead of using your directory token. (Request details here)
GET https://api.vcita.biz/platform/v1/payment/checkout/url_key
-
At that point, you want to redirect to your payment gateway page, where the user can place the credit card information.
Note: The payment gateway handles everything inside that window entirely. Our payment page will remain in the background during that time, awaiting a response from your app. -
Upon payment success (or alternately when the payment gateway accepts the payment request) redirect to:
https://vcita.application.domain/portal/business_id?
fromCheckout=true#/loader?
provider=external&
status=success&
key=url_key
- Upon payment failed redirect to:
https://vcita.application.domain/portal/business_id?
fromCheckout=true#/loader?
provider=external&
status=error&
key=url_key
- Send checkout update by webhook to: (Request details here)
https://api.vcita.biz/platform/v1/payment/checkout/
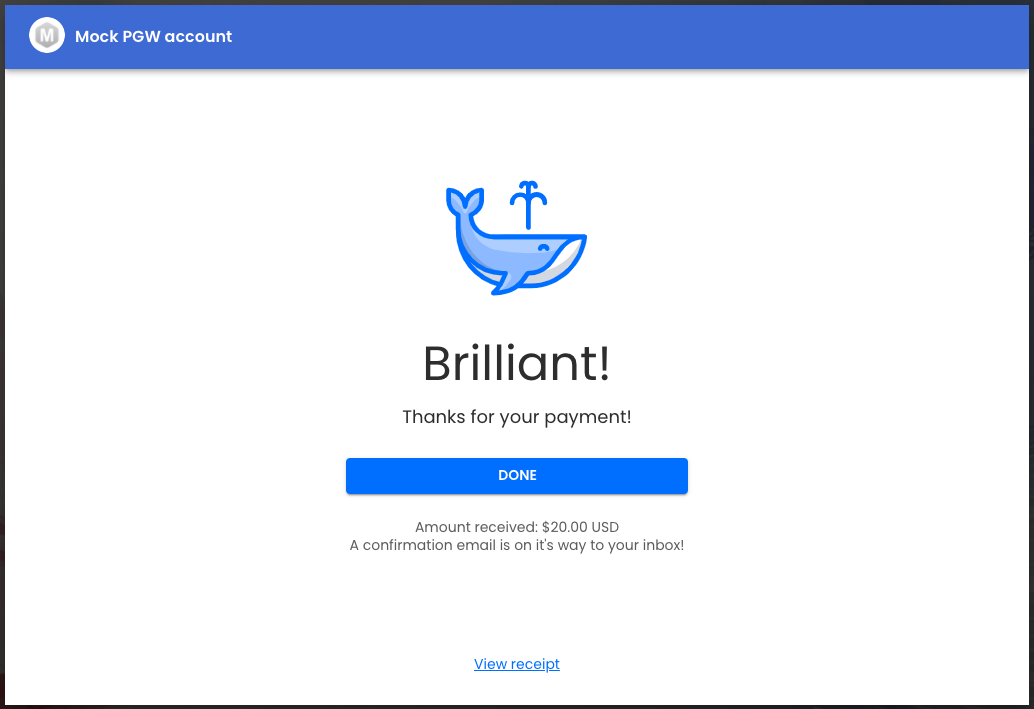
- Once approved, we will redirect the user to the final Thank You page, and by that end the checkout session.
Charge
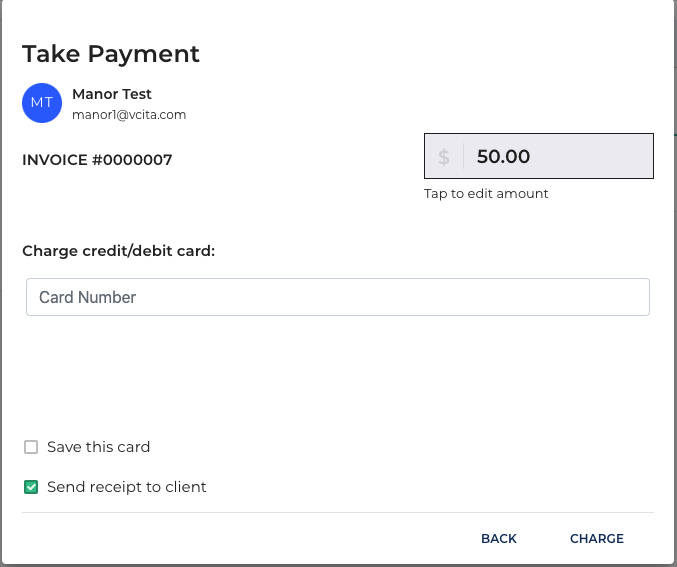
The charge flow is the ability to charge credit cards from the back office, by adding your application iFrame inside our UI where the business can enter the credit card information in a secure way.
- inTandem embeds your iFrame inside the Charge window by requesting the iFrame page from GET /charge.
- Interacting with the iFrame via JavaScript postMessage.
Once the user places all the required information inside the iFrame (card number, date, etc.) and clicks the Charge button, inTandem will interact with the iFrame and send it a POST message (JavaScript postMessage) with the following POST message object:
{
  type: 'generic',
  func: 'getToken',
  params: {
    amount: params.amount,
    save_card: params.save_card,
    pivot_id: params.thryv_id,
    client_id: params.client_id
  }
}
- In return, we are expecting a token. This token will be used throughout the payment process for identifying the card and transaction.
{
  token: TOKEN
}
- Once the token is received, inTandem sends a POST request to your application (/charge), containing the transaction details:
POST /charge body request:
{
    "amount": 10,
    "currency": "USD",
    "token": "addtkthQ16trAsldSar50v6sLfdmuQ",
    "description": "30 minutes phone call",
    "customer_id": "49v0ud9YhquOoYTczn0PkwdRn9QRb7"
}
customer_id
customer_id is optional and depends on the implementation of the “card on file” feature.
- Your app processes the payment with the payment gateway and responds with a charge_key value:
{
    "charge_key": "DzlrBcilbnvBd48gca8um3AkNHoj85"
}
The Charge flow ends when we are successfully receiving the charge_key value.
charge_key
The charge_key can be later used for the refund process.
-
The payment dialog closes at that point, and we will show a success page.
-
Upon transaction failure, you can send an error response (instead of ‘charge_key’) with the error message to be presented to the user.
{
    "error": "ERROR MESSAGE",
    "error_data": {
    "message": "error_message"
  }
}
Payment errors
error: error message to be displayed in the payment dialog.
error_data.message: the error message that will be displayed in the payment page when viewing the payment from the Payments page.
Card on file
A card on file allows users to save credit card information for future use instead of repeatedly entering their credit card information.
The credit card information itself should be stored on the payment gateway, and we will only save the following:
- last 4 digits
- card brand
- expiration month
- expiration year
- cardholder name
Listening to save card events
Some payment gateways require additional address-related information for saving cards that are not necessarily required otherwise when not saving clients' cards.
When processing the saved card with the payment gateway, the PGW generates a token for the saved card for future use. The payment app must pass along the client’s address information to generate that token. Otherwise, the save card process will fail.
For the payment app’s iFrame to know whether the “Save this card” checkbox in the charge dialog is selected, we created a new event that the iFrame will listen to that indicates the “Save this card” checkbox value.
When clicking the "Save this card" checkbox, we trigger an event called "setSaveCard" which includes a "checked" param with a true/false value - indicating the checkbox state.
The payment app’s iFrame can listen to that event just as it’s currently listening to the other events we're triggering (like the "getToken" for example).
iFrame host-window indication
Since cards can be saved from either the charge dialog or via the client’s card by clicking the Add Card button, the app needs an indication of whether its iFrame is opened via the Charge or Add Card dialog.
When the iFrame is opened via Add Card - the app will know to save the card by default.
To accomplish that, we pass another query param to the iFrame’s URL only when it’s being opened via the Add Card dialog:
"?save_card=true"
This way, the iFrame “knows” the host window is the Add Card and can automatically save the card.
Saving card-on-file on charge
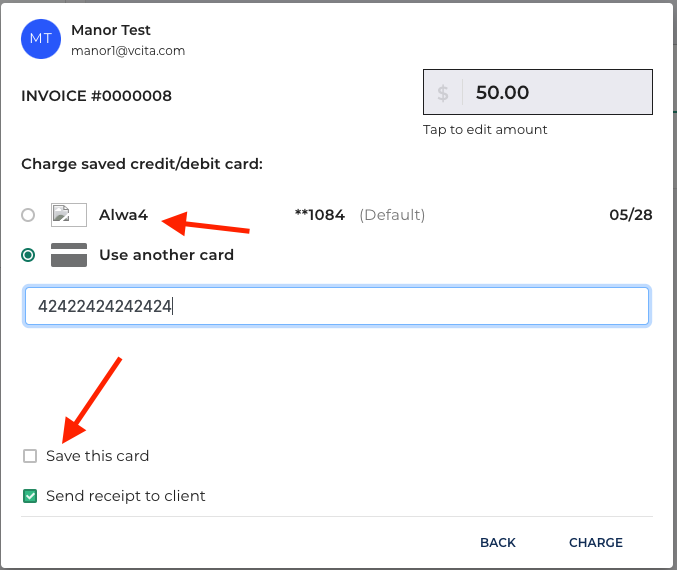
- The charge dialog contains a checkable input that allows users to select whether to save their card for future use when entering the credit card information in the iFrame.
-
When checked, we will send your app a POST request with the user’s email and name.
POST /customer body request:
{
    "email": "[email protected]",
    "name": "John Doe"
}
- As a response, we expect a customer id value. The customer id is the identifier of the credit card.
{
    "customer_id": "49v0ud9YhquOoYTczn0PkwdRn9QRb7"
}
-
We send the following POST request with the customer id that was received. This is a one-time process for newly created/saved cards.
POST /customer/:token/attach body request:
{
    "customer_id": "49v0ud9YhquOoYTczn0PkwdRn9QRb7"
}
- Expected response:
{
    "card": {
        "card_id": "addtkthQ16trAsldSar50v6sLfdmuQ",
        "card_info": {
            "card_brand": "visa",
            "last_4": 1217,
            "exp_month": 10,
            "exp_year": 2030,
            "cardholder_name": "John Doe"
        }
    },
    "customer_id": "49v0ud9YhquOoYTczn0PkwdRn9QRb7"
}
-
Removing saved cards is done by inTandem sending a request to:
POST /customer/:token/detach body request:
{
    "customer_id": "49v0ud9YhquOoYTczn0PkwdRn9QRb7"
}
Expected response:
{
    "token": "addtkthQ16trAsldSar50v6sLfdmuQ"
}
Saving card-on-file on checkout
Get payment information from inTandem (make sure that “allow_save_card” is true). If allow_save_card is false, either the client already has 3 cards saved, or the “checkout_vaulting” feature flag is missing for that account.
Saving cards on checkout is done in two steps:
-
Make sure that the save card feature is available at the account level.
When sending the GET request to /checkout/:url_key as part of the usual checkout flow, make sure that the value of the “allow_save_card” property is true.GET /checkout/:url_key body request:
{
    "status": "OK",
    "data": {
        "amount": "33.0",
        "currency": "USD",
        "name": "John Doe",
        "return_url": "https://clients.meet2know.com/portal/5e3c760d?fromCheckout=true#/loader",
        "email": "[email protected]",
        "client_id": "zlbsfegs493u9zmo",
        "invoice_id": null,
        "allow_save_card": true
    }
}
-
If “allow_save_card” is true, you can proceed with the checkout flow by appending the customer id and the card information when sending the payment checkout update request.
PUT https://api.vcita.biz/platform/v1/payment/checkout/ body request:
{
   "url_key": "ijGghOYFKTFClDWJQZSNzkaZDZNQOiksktubFXpXfWmdovxuSz",
   "card":{
       "card_id": "15dsanida54",
       "card_info": {
           "exp_month": "01",
           "exp_year": "2025",
           "last_4": "6666",
           "card_brand": "visa",
           "cardholder_name": "John Doe"
           }
   },
   "customer_id": "49v0ud9YhquOoYTczn0PkwdRn9QRb7",
   "created": "2020-11-26",
   "transaction_id": "12qw34rt56yu",
   "type": "checkout.session.completed"
}
Expected response:
{
    "status": "OK",
    "data": {}
}
Refund
When the Refund button is clicked from the back office (located on the payment page), we will send the transaction’s charge key to your app.
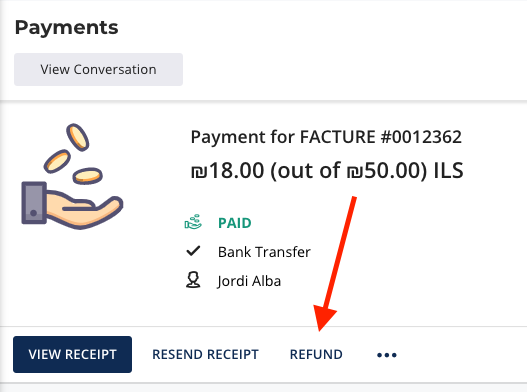
This charge_key value is the same one we received from your app when the initial transaction occurred, so you know the exact transaction ID that needs refunding.
POST /refund body request:
{
    "charge_key": "DzlrBcilbnvBd48gca8um3AkNHoj85"
}
Expected response when the refund process completes on your payment gateway:
{
    "success": "true",
    "data": {
        "refund_id": "uWND98GwGQlQyFo8tqFGbN1iDKKPho"
    }
}
Updated about 1 month ago
